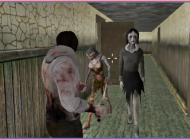
Forgotten Hill: Fall
About: Forgotten Hill: Fall
Forgotten Hill: Fall - A Haunting Journey into the Unknown
The House of Mystery Beckons
As the night falls and your car breaks down, you stand before a foreboding house, isolated and shrouded in darkness. This is where your adventure begins, an adventure into the enigmatic world of Forgotten Hill: Fall . It's a point-and-click game that will test your wit and courage as you delve deep into a house filled with secrets, traps, and puzzles.
Navigating the Enigmatic Environments
For those brave souls who have embarked on the eerie journey of Forgotten Hill: Fall, you've likely encountered some perplexing puzzles and enigmatic challenges. While walkthrough videos are readily available, this comprehensive guide aims to provide you with a deeper understanding of the game's riddles and mysteries.
Solving the Puzzles of Forgotten Hill
As you journey further into the house, you'll come across various rooms, each harboring its own set of puzzles and secrets. Let's unravel the mysteries one by one:
The Hallway: Commence your quest by grabbing the lighter and key. Use the key to unlock the door.
The Kitchen: In the kitchen, collect a candle, a knife, some cheese from the freezer, and a cod fish.
Bugs and Spiders Door Puzzle: Solve this puzzle by mirroring the picture with bugs (6 legs) and spiders (8 legs) found in the library. Click the small buttons to match the sequence.
The Lab: Acquire a screwdriver, poison, and a dead frog.
The Library: Retrieve a piece of the picture and a red book from the second-to-last shelf.
Spike the Spider: Avoid touching the spider to prevent a grisly fate. Instead, use the knife to obtain the heart jewel.
Masks Puzzle: Masks in the house have three different positions. Pay attention to the blood symbol on the wall, which corresponds to the first shelf in the library. Arrange the masks in the same sequence as the books on that shelf (UP-DOWN-UP-MIDDLE-MIDDLE) to unveil a secret drawer containing another piece of the picture.
Kid's Door Puzzle: Take note of colors and symbols on little cubes scattered throughout the house. Match these to the symbols on the kid's door for a solution.
The "Smiling" Door Puzzle: Behind the red book in the library, you'll discover a sequence of symbols carved into the wood. Apply this sequence to the smiles on the door (UP – RIGHT – DOWN – LEFT).
Ghost Child: To avoid a deadly encounter, offer the ghost child her beloved teddy bear, Willy.
The Graveyard Door: To access the graveyard, place candles on the candlesticks and light them. Then, use the heart jewel found behind the spider on the Crucifix. The cross will ascend, revealing the key to the graveyard.
The Deer: Place the horn found in the crypt on the deer's head and claim the ring held in its mouth.
The Graveyard Puzzles: Solve the puzzles on the tombstones to summon a hand from the ground. Place the ring on the hand and retrieve another piece of the picture.
Toy Train: Wind up the toy train in the kid's room using the toy key. When the lullaby concludes, take the picture's piece.
The Picture: Assemble the four picture pieces inside the frame and also retrieve Willy.
The Basement: Hand over Willy to the ghost child, granting you further access to the room. Collect the fuse from the wall, place the cheese from the freezer on the plate in front of the mouse-hole, and apply the poison from the lab to the cheese. Return later to find a deceased mouse.
Kid's Room Hanger Puzzle: Follow the rhyme in the book to hang the frog, skip one hanger, hang the mouse, and leave the last hanger empty. Take the jewel inside the clown's mouth and place it on the statue in the basement wall.
Electricity: Employ the screwdriver from the lab to open the switchboard in the hallway. Insert the fuse, enabling you to illuminate the house.
E-Adder: Activate the E-Adder and insert the COD. You'll receive a CODE.
Exit Door: Employ the code (7428) on the right part of the mechanism. Understand that the Roman numerals denote the first number of the bar. The second bar starts from 3, the third from 5, and the last from 6. Use the symbols from the Celtic cross in the graveyard on the left engine to unlock the door.
Escaping the Enigma
With the Silver Cross in your possession, you have successfully navigated the treacherous depths of the haunted house, avoiding the clutches of the werewolf. As you step out into the night, the chilling memory of your adventure lingers. Remember, in the world of Forgotten Hill, mysteries never truly conclude, and more eerie tales await those bold enough to explore further.
Instructions
Using Mouse
